Fragment growing tutorial
FragPELE is a new tool for in silico hit-to-lead drug design, capable of growing a fragment from a bound core while exploring the protein-ligand conformational space.
This tutorial aims to describe the general protocol to run FragPELE.
Previous Requisites
Complex PDB: The PDB processed file. Prepare the system with the Schrödinger Protein Preparation Wizard. It is recommended to delete all water molecules as well as filling in missing loops and side chains. It is obligatory that the protein is protonated.
- Furthermore, make sure the ligand has:
A unique chain ID.
Unique PDB atom names with no spaces or single letters.
NO residue name except for UNK.
Fragment PDB: The PDB with the desired fragment. The chain of the fragment must be renamed to “L”.
Launch a FragPELE simulation
1. Protein Preparation
Launch Schrödinger Maestro.
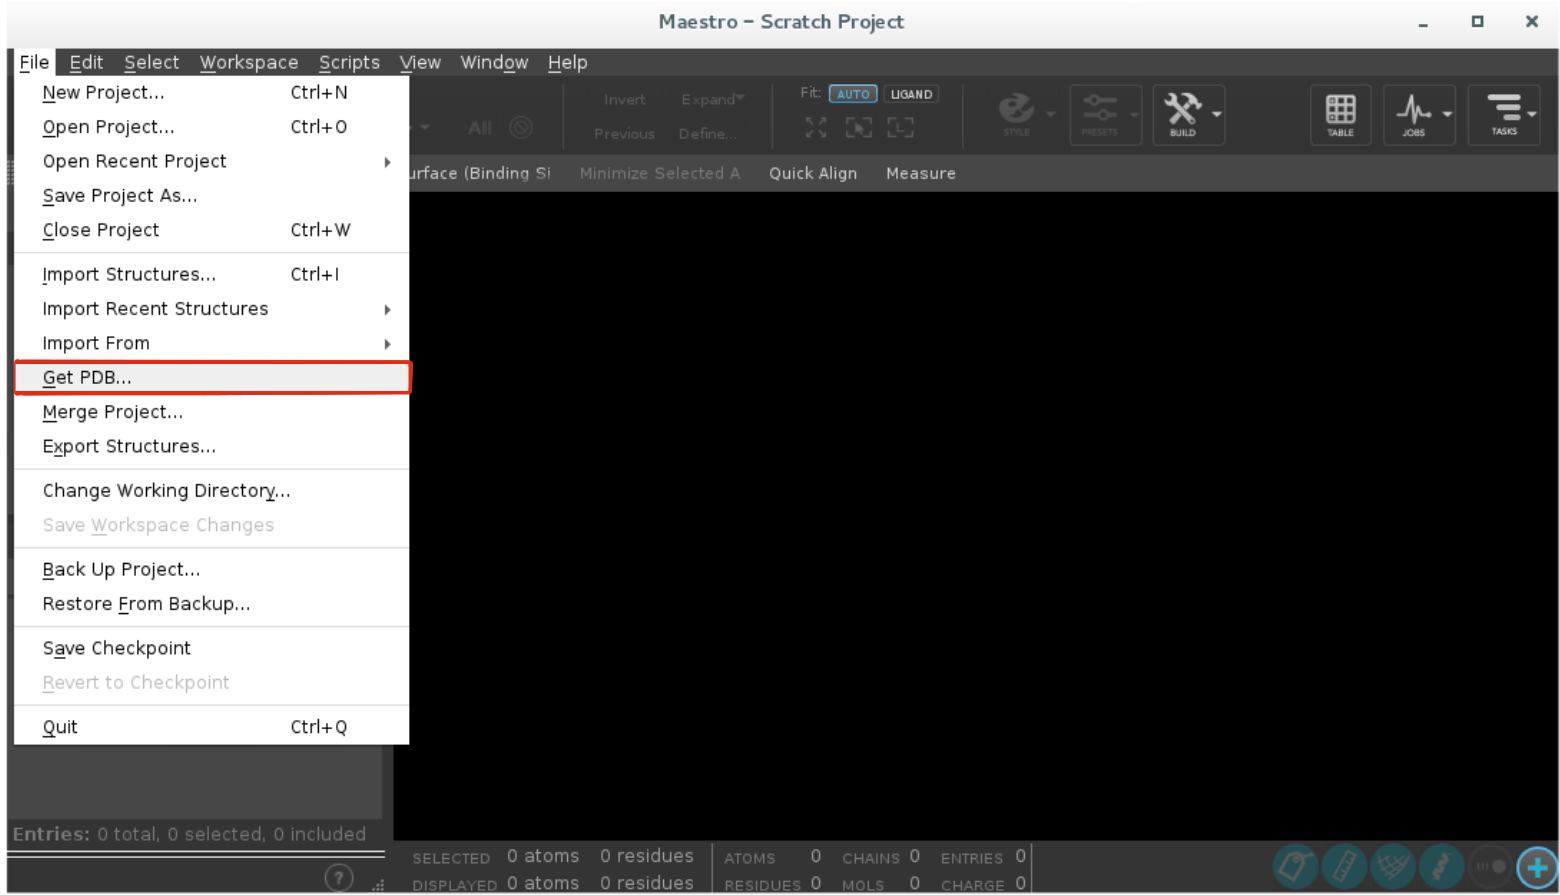
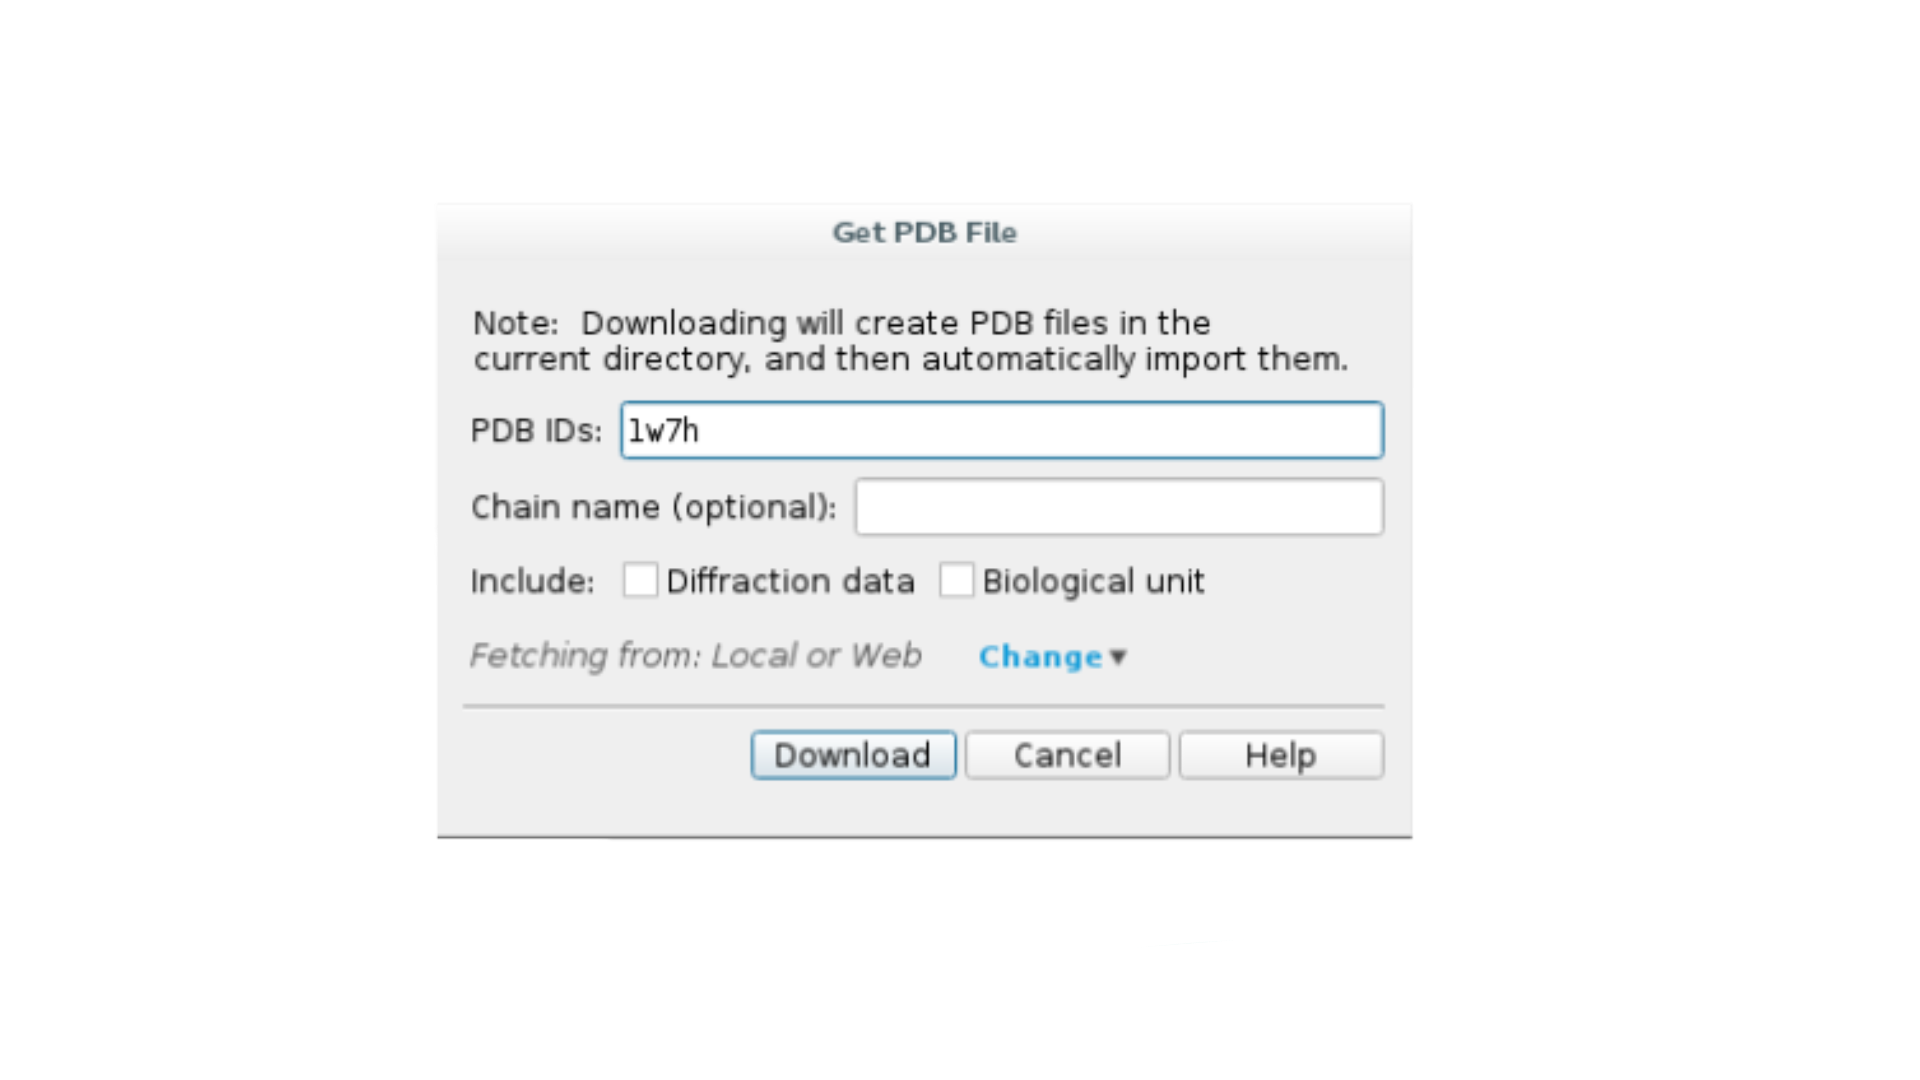
Click
File -> Get PDBand type your PDB ID to import the structure.
To preprocess the protein, go to
Tasksand search forProtein Preparation Wizard. Select the following options:
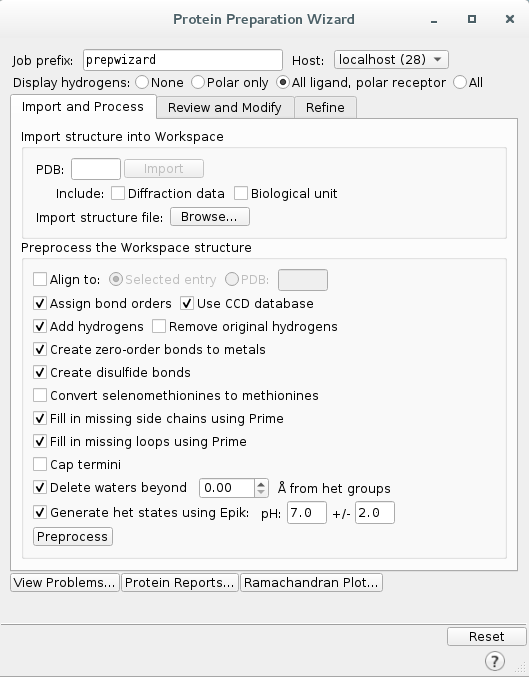
Click Preprocess to start the preprocessing of the protein.
- Change the ligand chain ID and the residue name.
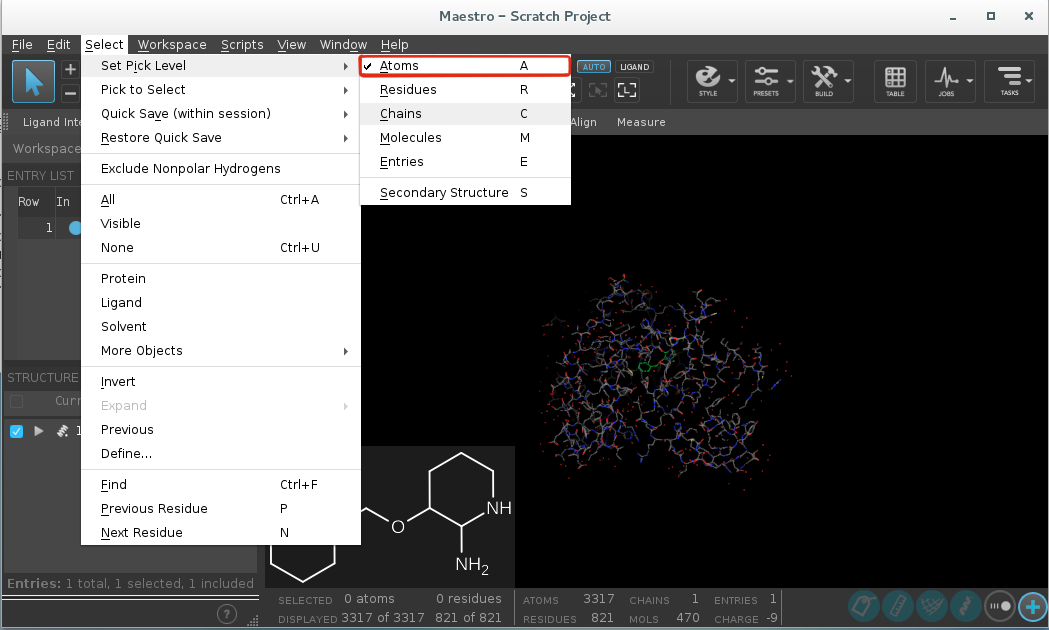
Go to
Select -> Set pick level -> Residues.
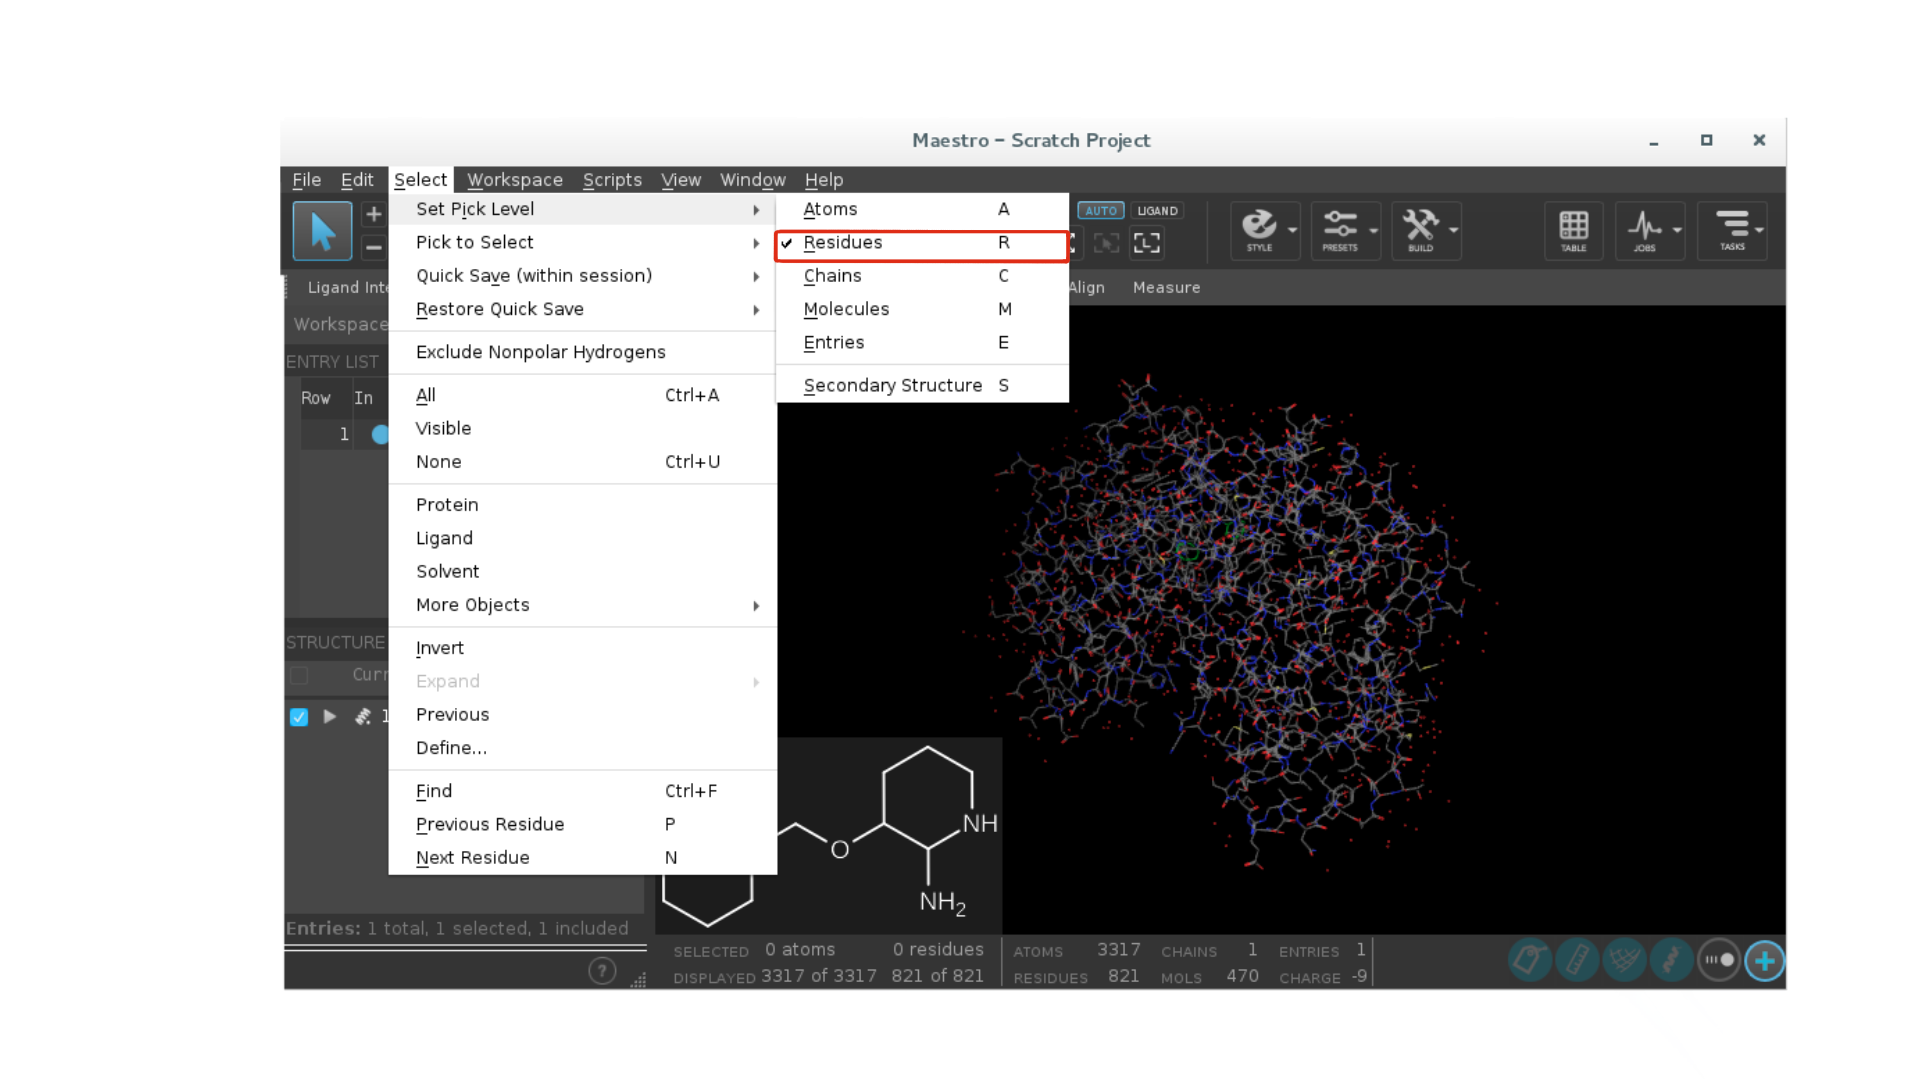
Select the ligand with a mouse click.
Go to
Buildand click onOther edits -> Change atom properties.
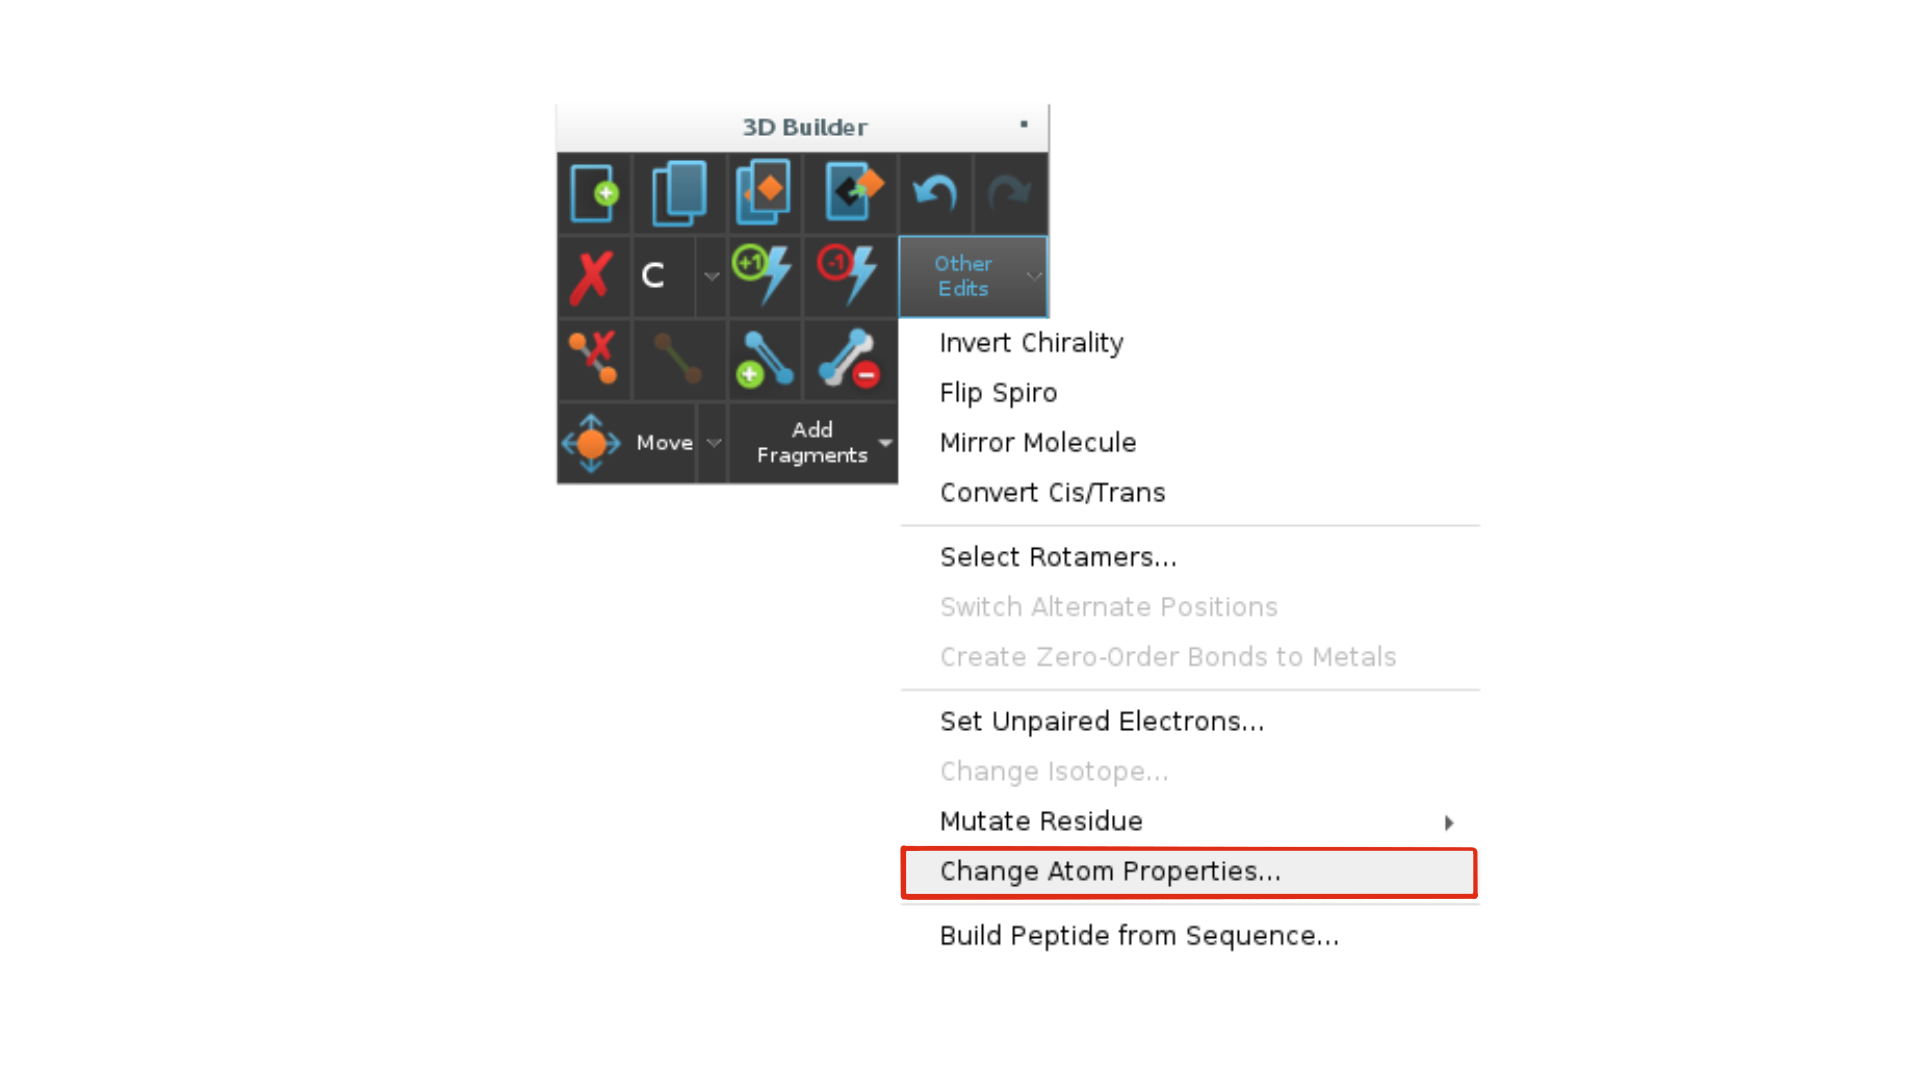
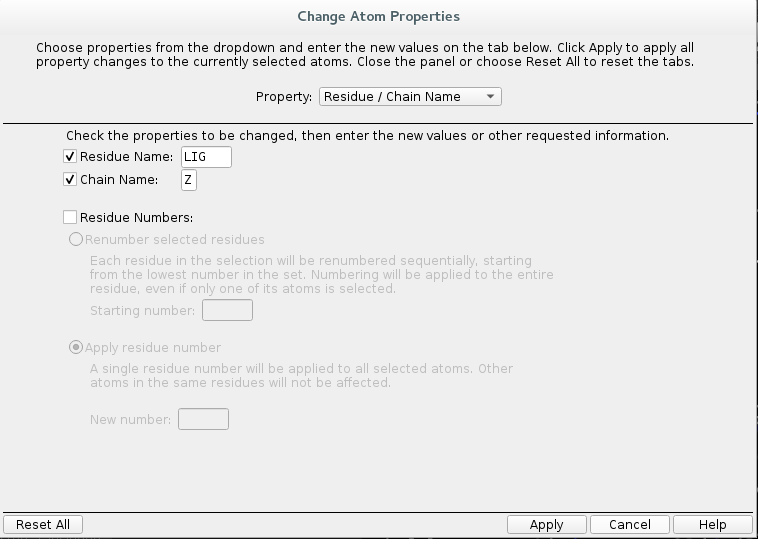
Change
Residue NametoLIG.Change
Chain NametoZ.
Select
PDB atom namefrom the drop down list and selectSet unique PDB atom names within residues.
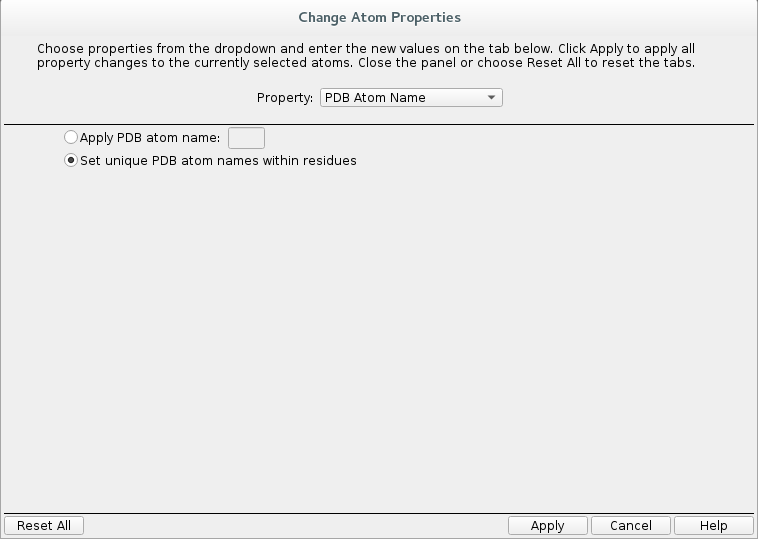
Click
Apply.Close the window.
Finally, export the structure by going to
File -> Export structuresand save it to your working directory.
2. Ligand Preparation
Select the ligand with a mouse click and extract it to a separate entry opening
Buildand clickingCopy selected atoms to new entry.Now define the R-groups:
Hit
Select -> Set pick level -> Atoms.
Click on any hydrogen atoms adjacent to a Nitrogen.
Go to
Tasks -> Enumeration -> Custom R-Group.Choose
R-groups to Create a Hydrogen Bondfrom the drop down list.
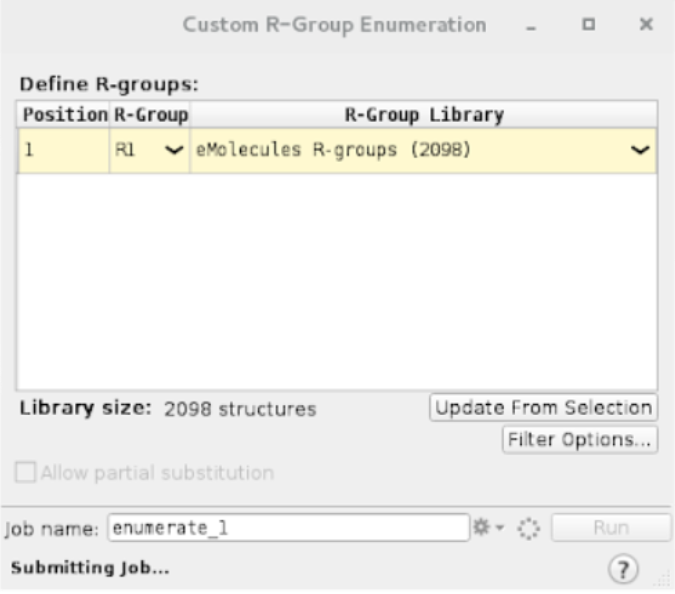
Click
Runto submit the job.
A new group on the entry list is created once the job finishes. Select all enumerated ligands by clicking on the group.
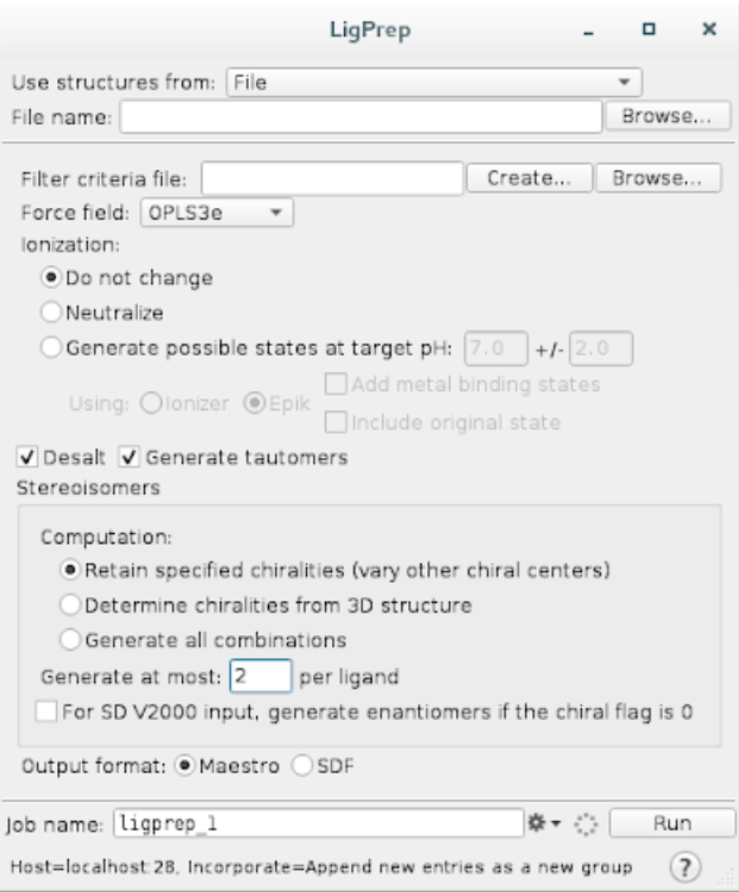
Go to
Tasks -> LigPrepCheck the following options and hit
Run.
A new group on the entry list is created after LigPrep finishes. Select all the entries of the group as in step
2c.Go to
Export -> Structuresand save the file asligands.sdfin your working directory.
3. YAML Input File
The input file input.yaml must contain:
frag_core: Path to the processed PDB file containing the protein and docket scaffolds.
frag_ligands: Path to the SD file wit fully grown and preprocessed ligands.
resname: Unique residue name of the scaffold.
chain_core: Unique chain ID of the scaffolds.
cpus: Number of CPUs to use.
frag_core: "scaffold.pdb"
frag_ligands: "ligands.sdf"
resname: "LIG"
chain_core: "Z"
cpus: 50
Note: It is recommended to first run the simulation including test:true in the input.yaml file to check that everything works. The test will be executed with 5 CPUs.
frag_core: "scaffold.pdb"
frag_ligands: "ligands.sdf"
resname: "LIG"
chain_core: "Z"
test: true
4. Launching FragPELE
To run the system launch the simulation with the following command:
python -m pele_platform.main input.yaml
5. Results
- The simulation will create a folder with the following organization:
pregrow: Contains the initial PDB files.
growing_steps: There is a folder for each growing step from the simulation. In each of these folderes, there is:
A report file for each CPU launched. This report contains the information of the number of the task, the number of accepted Pele steps, the current energy and binding energy of each step and the sasaLig, which is the solvent accesible surface area.
A PDB file of the trajectory.
sampling_result: Growed fragment from each trajectory.
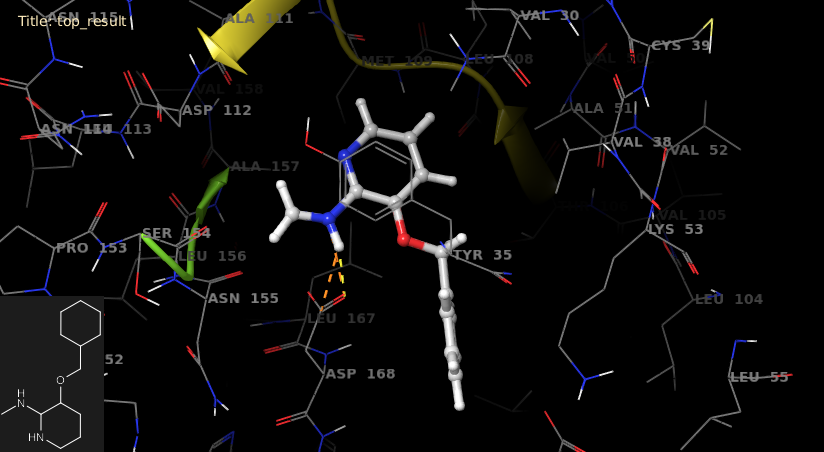
top_result: Top results from each trajectory.
clustering_PDBs: There is a folder for each growing step from the simulation. In each of the folders there is:
Initial PDB file for each trajectory.
control_folder:
conffile for each growing step from the simulation.DataLocal: Contains the ligand templates. When you run a simulation, the ligands are parametrized and stored in this folder.
top_result.pdb: PDB file of the top result from the simulation.
pele_template.conf